

close
Choose Your Site
Global
Social Media

Views: 0 Author: Site Editor Publish Time: 2026-10-01 Origin: Site


High-fidelity audio and professional commercial AV installations fail when standard mounts face extreme structural limits. Standard hardware cannot handle intense acoustic demands over time. A rigid foundation remains completely non-negotiable for premium sound reproduction. At the decision stage, selecting hardware requires moving beyond basic aesthetic preferences. You must evaluate critical engineering realities. Assess structural integrity, acoustic targeting, and specific substrate limitations. Overlooking these factors introduces severe equipment risks. It also degrades the listening experience through mechanical resonance. This guide breaks down the exact evaluation criteria for specifying a custom speaker bracket safely. It shows you how to eliminate vibration sag completely. You will learn to lock in precise acoustic angles effortlessly. Finally, we explore proven methods to match mounting hardware to complex wall materials.
Off-the-shelf brackets often rely on flawed universal designs. They introduce points of failure when supporting heavy, non-standard, or high-value speaker cabinets. Universal joints often cause progressive sagging. They also create acoustic misalignment and dangerous hardware shearing. Businesses cannot afford these predictable failure rates.
In commercial settings, stage environments, or high-end home theaters, a falling speaker creates a catastrophic liability. Venue owners face massive safety risks if structural rigging fails. Falling equipment endangers lives and destroys expensive electronics simultaneously. You must mitigate these physical dangers through rigorous engineering standards. A proactive approach prevents costly legal and operational disasters.
A successful custom specification ensures zero degree drift over time. It guarantees total vibration isolation from the mounting surface. It also delivers verified, documented safety margins. We recommend evaluating every installation against strict structural criteria.
Common mistakes often involve trusting basic marketing claims. Avoid purchasing based solely on aesthetic appeal. Function and physical safety must always dictate the final form.
Many buyers look only at static weight ratings. This remains a highly dangerous oversight. You must evaluate brackets based on dynamic load capabilities. Heavy bass frequencies produce continuous, violent vibrations over time. These micro-movements stress mechanical joints far beyond the static weight maximum. A 50-pound speaker acts like a much heavier object when pumping low-frequency energy. Buyers must account for this kinetic energy.
Industry standards dictate strict safety ratios for professional rigging. Engineers typically require a 5:1 or 10:1 safety ratio. If a speaker weighs 50 pounds, the mount must support 250 to 500 pounds before failure. Overhead environments always require the higher ratio. This massive buffer absorbs unexpected physical shocks. It also protects against accidental human impact during maintenance.
Material fatigue plays a massive role in hardware lifespan. You should assess the thickness of the steel or aluminum backplate. Inspect the quality of weld points and cast joints carefully. Continuous stress fractures cheap alloys quickly. High-carbon steel and aerospace-grade aluminum resist these micro-fractures much better. Routine visual inspections help identify early signs of metal fatigue.
Load Assessment Matrix
| Evaluation Metric | Force Characteristics | Engineering Requirement |
|---|---|---|
| Static Load | Downward gravitational pull | Base weight multiplied by 5 (minimum) |
| Dynamic Load | Kinetic vibration and bass resonance | Rigid mechanical decoupling pads |
| Shear Strength | Downward force on mounting bolts | High-tensile steel fasteners required |
| Tensile Strength | Pull-out force away from the wall | Reinforced backing plates and structural anchors |
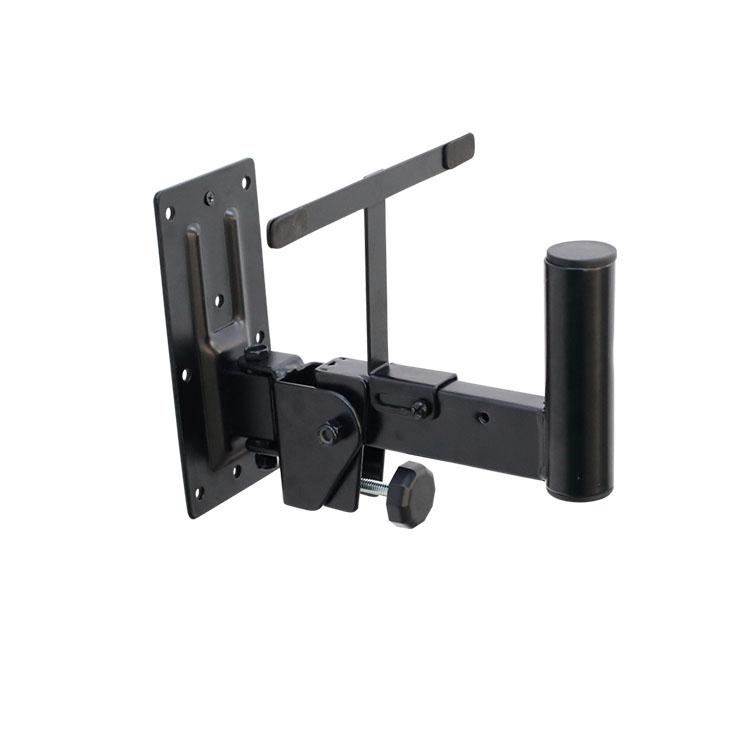
Balancing aesthetics and functionality requires a strict clearance trade-off. Users often desire a low-profile, flush-mount look. However, deep pan and tilt adjustments require physical space behind the cabinet. You cannot have extreme angles without providing sufficient wall clearance. The speaker box will physically strike the wall otherwise. Installers must calculate the exact sweep radius before drilling holes.
Locking mechanisms dictate long-term stability and acoustic precision. Heavy speakers require toothed or geared locking joints. Fixed shims also prevent downward tilt over time. Friction-ball joints represent a major failure point in pro audio. Skip them entirely for heavy applications. Vibration easily defeats friction locks, causing immediate and permanent sagging. Geared teeth physically interlock, making drift mechanically impossible.
Custom brackets utilize specific tilt degrees for acoustic alignment. A fixed 15-degree down-tilt often optimizes the listening sweet spot. This avoids relying on movable joints entirely. Movable components inherently weaken the overall mounting structure. Rigid, fixed-angle brackets preserve both audio fidelity and physical safety. They eliminate internal reflections and focus high frequencies directly at the listener. Best practices suggest measuring off-axis response before finalizing the mounting angle.
The wall material completely dictates your mounting strategy. A robust custom speaker wall bracket will fail on an incompatible substrate. Wood and steel studs demand specific approaches. You need wide spanning plates to distribute heavy loads across multiple studs. Installers must use structural lag bolts rather than standard wood screws. Pre-drilling pilot holes prevents wood splitting and maximizes thread engagement.
Concrete and masonry require entirely different hardware solutions. You must evaluate the pull-out strength of the substrate. Installers should specify expanding sleeve anchors for solid concrete. Use chemical epoxy anchors for maximum security in older masonry. Epoxy prevents structural blowout in brittle brick. Always clear dust from drilled holes before injecting chemical resin.
The drywall fallacy catches many inexperienced technicians off guard. Never mount heavy custom audio equipment directly to drywall using toggle bolts. This serves as a clear, evidence-based warning. Vibrational load causes the fragile gypsum substrate to crumble over time. The anchor will eventually pull straight through the wall. Always anchor into a structural stud or reinforced plywood backing plate. Ignoring this rule guarantees eventual hardware failure.
Hole pattern matching serves as your final technical hurdle. You must verify compatibility between the speaker’s mounting points and the bracket plate. Many consumer speakers use standard VESA layouts. Professional cabinets often feature proprietary configurations. Always measure the exact distance between threaded inserts. Confirm the thread pitch matches your supplied bolts.
Decision-makers often use specific models as a baseline for quality. For example, the JYSP-120 provides an excellent engineering benchmark. It features exceptional load ratings and solid material composition. This makes it ideal for stage monitors and heavy home theater surrounds. It bridges complex speaker hole patterns seamlessly. It also adapts to rigid architectural constraints without compromising safety.
Cable management integration elevates the final professional installation. Check if the hardware allows for concealed wire routing. Routing cables directly through the mounting arm maintains architectural aesthetics. It also protects delicate wiring from accidental physical damage. Clean wire paths prevent signal interference and simplify future maintenance.
Follow this checklist to verify complete hardware compatibility:
A strategic decision framework guarantees successful audio deployments. Buyers should follow strict guidelines to ensure safety and performance. First, weigh the speaker and calculate dynamic safety ratios. Second, identify the exact wall substrate to dictate fastener selection. Third, determine the necessary tilt and pan for targeted acoustic dispersion. Finally, select a matching bracket engineered for those exact parameters.
Your next steps require precise data gathering. Encourage your installation team to verify exact mounting hole dimensions immediately. Consult local structural guidelines before finalizing procurement. Taking these actions eliminates guesswork and secures your acoustic investment for decades.
A: You must add a significant safety margin to the speaker's stated static weight. Industry standards typically require multiplying the weight by 3x to 5x. Commercial overhead environments may require a 10x safety ratio. This buffer accounts for dynamic vibration and unexpected physical impacts over time.
A: Yes, proper mounting hardware reduces structural resonance significantly. High-quality brackets use rigid mounting points against solid studs or masonry. This decouples bass energy from fragile surfaces like drywall. Adding isolation pads between the speaker and the bracket plate further dampens mechanical vibration transfers.
A: No, TV mounts present severe dangers for audio equipment. TVs sit close to the wall with a shallow center of gravity. Deep speaker cabinets pull the center of gravity outward. This creates massive leverage forces. TV mounts also lack the geared locking mechanisms required to prevent acoustic sagging.
